Monday, 2 June 2014
Ahoy there!
Friday, 21 March 2014
Oh, Hello!
Saturday, 25 January 2014
Let's go to the {blog}hop!
Hi there!
Thanks for stopping by. Hopefully, you are on your way around our fantastic Sale-a-bration blog hop. If not, follow the links at the bottom of this post to see some amazing projects from some fantastic demos - all themed around the hotly anticipated Stampin' Up! Sale-a-bration event.
Between January 28th and March 31st 2014, every £45 you spend with Stampin Up! will earn you a FREE exclusive product from the Sale-a-bration range. That's not limited to 1 per customer order, it's 1 for EVERY £45 you spend. So come back on Tuesday and visit my online store to get yours.
Whilst you are here, pop over to my Stampin Up! website to see my current classes and events.
I have been playing with the gorgeous 'petal parade', a set of 5 stamps which is available in both clear and wood mount options/ I have also been using some of the co-ordinating designer paper called 'sweet sorbet', a lovely combination of fresh spring colours - sahara sand, crisp cantaloupe, pool party, pistachio pudding and black.
I started off with a couple of cards and got my wonderful envelope punch board out for a play. It's one of the best gadgets I have ever bought.
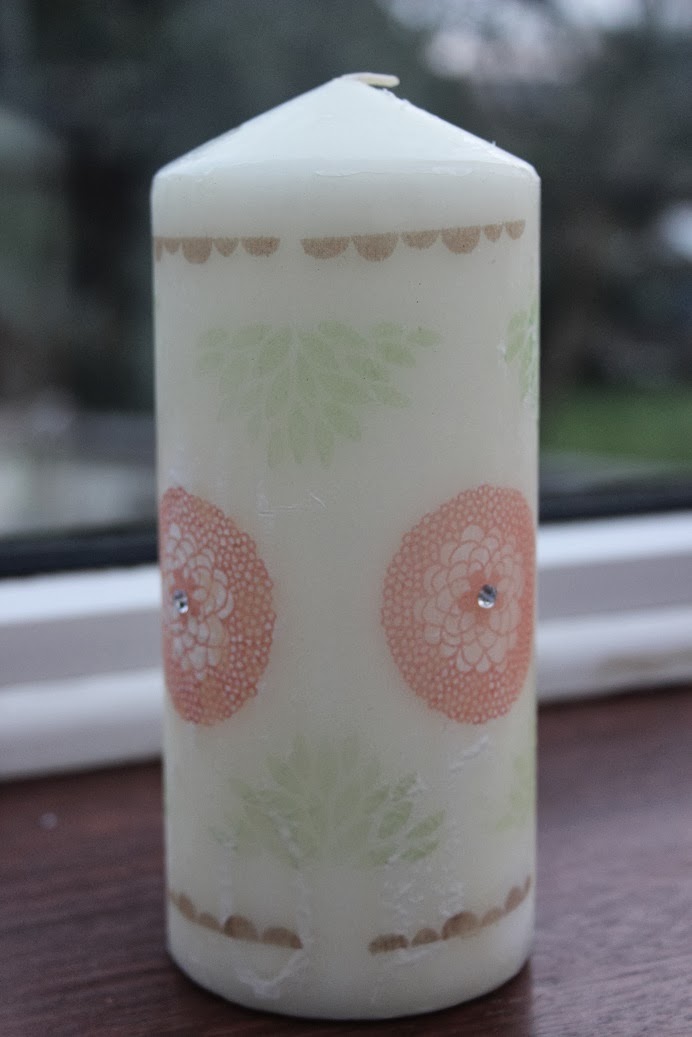
I then decided to have a go at decorating a candle, this is super easy, all you need is your heat tool, some tissue paper and waxed paper. Stamp onto the shiny side of the tissue paper, trim and position on your candle. Wrap tightly with waxed paper and give it a blast of heat until the tissue is soaked with molten wax. I added a couple of rhinestones to mine for added glamour, but I'm not sure that would work so well if you wanted to burn the candle.
After all that crafting, I was in need of a cup of tea and a hobnob (and a little look at my Stampin' Up! catalogue to see what goodies I might treat myself to this Sale-a-bration)
Now off you go to the next blog - but please come back soon x
Friday, 29 November 2013
Christmas Robin
I've just returned from the Stampin' Up! Annual European Convention in Manchester. It was amazing, there were around 700 demonstrators from 5 countries and we spent 2 days enjoying demonstrations from our top crafters, business sessions and technique classes.
The classes plus display boards inspired me to build my business and engage with my customers as much as I can. To this end I have started to publish a monthly newsletter and aim to post on my blog at least once a week.
Today I am sharing a card that I made at my Christmas workshop earlier this month.
The card is a side step fold, and uses papers from the season of style dsp stack along with the wishing you stamp set, both from the seasonal catalogue. Our inks are cherry cobbler and old olive.
The cutie Robin made using the ever versatile owl builder punch - is there anything it can't be used for!
Tuesday, 29 October 2013
O Holy Night
This is another of the cards the ladies made at my Christmas stamp a stack class.
It uses the main stamp from the "O holy night" set. I fell in love with this set the moment I first saw it in the seasonal catalogue. It uses the lyrics of traditional carols alongside festive sentiments in a really modern style. The perfect combination!
I have used the winter frost dsp stack as my colour inspiration, taking smoky slate as my cardbase, island indigo for the mat and stamped in coastal cabana and island indigo inks.
I have finished it off with a small rhinestone and a couple of strips of the silver glimmer paper. This is fantastic value at £4.50 for 5 12"x12" sheets. It is super sparkly, doesn't leave a trail of glitter every time you touch it and a little bit goes a long way!
Sunday, 27 October 2013
Getting festive
Good morning! After an early awakening by the little boy I thought I would do a quick post about the cards we made at my Christmas stamp a stack class.
I had 14 lovely ladies stamping the night away. We made 4 different designs of card, making a total of 12 cards to kick start the festive feeling. Homemade gingerbread men provided much needed fuel for the marathon session!
This card uses the gorgeous Joyful Christmas stamps - I love the poinsettia and have seen some amazing projects which use it - both cards and 3D items. It's just beautiful stamped in cherry cobbler ink on a very vanilla mat. The leaves are I gumball green and the sentiment has been coloured with the coordinating stampin write markers.
All this has been mounted on a gumball green mat and cherry cobbler card base.
I just added a little sparkle with a few basic rhinestones.
Who wouldn't love to receive this card? it would definitely have pride of place on my mantle piece - if I had one!
 As usual you can buy all the supplies for this project by visiting my online store - go to the stampin' supplies tab at the top.
Wednesday, 2 October 2013
Feeling chilly
Here's a little sneak peek at a project that I have been making.
I love my owl builder punch. It was the first item on my wishlist and I have never regretted buying it. These cute little penguins are so simple to make using the punch and just a few snips with your scissors - but don't they look amazing.
I used hand torn strips of whisper white cardstock distressed along the torn edge with island indigo ink and a dauber to make a snowy landscape.
Get in touch with me if you would likely to join us at our Christmas workshop and have a go at making your own!


